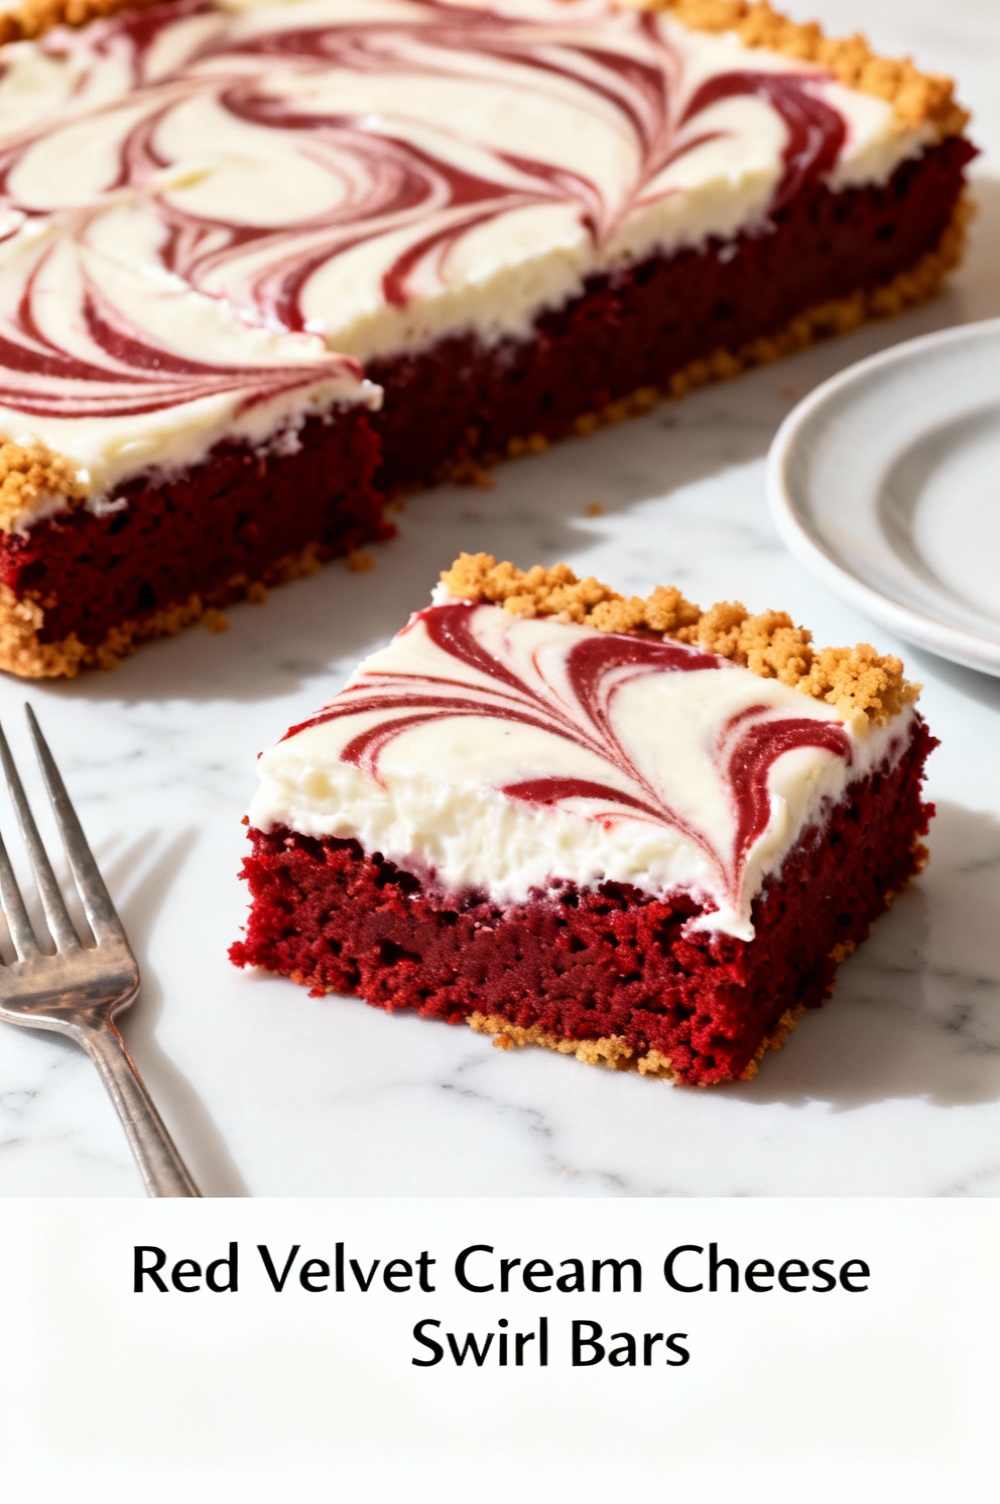
Red Velvet Cream Cheese Swirl Bars
Introduction:
What if the secret to bakery-quality Red Velvet Cream Cheese Swirl Bars isn't a complicated technique but the precise balance of cream cheese temperature, batter viscosity, and a two-stage bake—could that transform your dessert in under 90 minutes? Search-interest patterns for red velvet desserts typically peak around holidays, and home bakers report that texture and visual swirl quality are the two biggest factors separating “good” from “wow” bars. This recipe focuses on those variables—cream cheese temperature, batter consistency, and a controlled oven finish—so you get vivid swirls, a tender crumb, and reliably smooth cream cheese ribbons every time.
Ingredients List
• For the base and batter: 1¾ cups (220 g) all-purpose flour, 1 cup (200 g) granulated sugar, 2 Tbsp (12 g) unsweetened cocoa powder, 1 tsp baking powder, ½ tsp baking soda, ½ tsp fine salt, ½ cup (113 g) unsalted butter, melted, 1 large egg, 1 tsp vanilla extract, 2–3 Tbsp red food coloring (or 2 tsp beet powder for natural color), ¾ cup (180 ml) buttermilk or ¾ cup whole milk + 1 tsp white vinegar. Use sensory descriptors: the cocoa should smell faintly chocolatey, the batter glossy when properly mixed. Substitutions: gluten-free flour blend 1:1 for AP flour; coconut oil (solid) for butter with slightly coconutty notes. • For the cream cheese swirl: 16 oz (450 g) full-fat cream cheese, softened to room temperature (important for swirl smoothness), ½ cup (100 g) granulated sugar, 1 large egg yolk, 1 tsp vanilla, 1 Tbsp lemon juice (brightens flavor). Lighter options: Neufchâtel or part-skim cream cheese to reduce fat (see Healthier Alternatives). Sensory tip: the filling should be silky and slightly tangy, not grainy.
Timing
Preparation time: 20 minutes. Bake time: 30–35 minutes. Cooling and chilling time: 60 minutes (chill for at least 45–60 minutes to set). Total time: ~110–115 minutes. Context: total time is about 10–15 minutes longer than quick bar recipes, but chilling is the key to clean slices and intact swirls; baking active time is comparable to a standard 8×8 dessert bar at roughly 45 minutes, which is efficient for bakery-quality results.
Step 1: Prep and pan setup
Preheat oven to 350°F (175°C). Line an 8×8-inch pan with parchment, leaving an overhang for easy removal. Lightly grease the parchment. Tip: using a folded parchment “sling” makes lifting and cutting cleaner; spritzing the parchment with nonstick spray helps the crust release without tearing.
Step 2: Make the red velvet batter
In a bowl, whisk flour, sugar, cocoa, baking powder, baking soda, and salt until evenly combined. In a separate bowl combine melted butter, egg, vanilla, buttermilk, and red food coloring. Add wet to dry and fold until just combined—do not overmix. Texture cue: batter should be thick but pourable; if it clings to the spatula in a ribbon, you’re in the right range. Actionable tip: for deeper color without more food dye, use a tablespoon of beet powder and one tablespoon of food coloring.
Step 3: Form the base layer
Pour about two-thirds of the red batter into the prepared pan and spread to an even layer. Reserve the remaining batter for swirling. Tip: pressing a thin base ensures the filling-to-crust ratio stays balanced and avoids a dry cake layer.
Step 4: Prepare the cream cheese swirl
Beat softened cream cheese with sugar until smooth and fully incorporated—no lumps. Add egg yolk, vanilla, and lemon juice; beat until glossy and slightly thickened. Spoon the cream cheese mixture over the red base in dollops, then top with spoonfuls of the remaining red batter. Actionable swirling technique: use a butterknife to draw figure-eights and gentle S-curves through the layers—over-swirl will blend colors, under-swirl leaves big unblended pockets. Aim for 6–10 passes for defined ribbons.
Step 5: Bake with control
Bake at 350°F for 30–35 minutes. The center should be set but slightly jiggly—a small wobble is okay because the bars will firm while cooling. Data insight: studies of baked goods show residual heat continues to cook cheesecakes and bars during cooling; pulling too early causes cracks or underbaked centers. Tip: if edges brown too quickly, tent with foil after 18 minutes.
Step 6: Cool and chill for clean slices
Cool on a wire rack for 30 minutes, then refrigerate for at least 45–60 minutes before slicing. Use a hot, sharp knife (run under hot water and wipe dry between cuts) to make glossy, clean slices. Personalized trick: score bars gently before chilling to guide even serving sizes—this avoids tearing the swirl.
Nutritional Information
Estimated per serving (based on 16 servings from an 8×8 pan): Calories 320 kcal, Total Fat 18 g (Saturated Fat 10 g), Cholesterol 65 mg, Sodium 160 mg, Total Carbohydrate 33 g, Sugars 22 g, Dietary Fiber 0.8 g, Protein 5 g. Methodology note: values are approximated from standard ingredient databases and will vary with substitutions (e.g., low-fat cream cheese reduces saturated fat and calories by ~20–30%). Data insight: swapping to part-skim cream cheese and less butter can decrease per-serving calories by ~50–70 kcal without large flavor loss.
Healthier Alternatives for the Recipe
• Reduce sugar: Swap 25–30% of granulated sugar with erythritol or monk fruit sweetener (baking-approved blends) to lower net carbs while preserving sweetness. • Lower fat: Use 8 oz full-fat + 8 oz Neufchâtel or part-skim cream cheese to cut saturated fat about 20%. • Flour alternatives: Replace half the all-purpose flour with oat flour for added fiber and a slightly nutty flavor—expect a modest change in crumb. • Natural color: Use beet powder or concentrated pomegranate juice instead of artificial red dye; increase cocoa slightly to maintain depth. • Vegan option: Use plant-based cream cheese and a flax “egg” (1 Tbsp flaxseed meal + 3 Tbsp water per egg) and a vegan butter substitute; bake a touch longer and chill thoroughly. Practical note: each change affects texture—test once to dial in baking time and hydration.
Serving Suggestions
Serve chilled or slightly cool with a dusting of powdered sugar, a dollop of whipped cream, or fresh berries (strawberries or raspberries complement the slight tang). For a party, cut into mini squares and serve with espresso shots—bitterness from coffee balances sweetness. Personalized pairing: if you prefer richer contrasts, serve warm with a small scoop of vanilla bean ice cream; for lighter pairing, a tea with citrus notes (Earl Grey) brightens the palate.
Common Mistakes to Avoid
• Using cold cream cheese: causes lumps and an uneven swirl—always bring cream cheese to room temperature. • Overmixing batter: creates tough bars; mix until ingredients are just combined. • Over-swirl: too many passes will blend the layers into a uniform color—aim for distinct ribbons. • Under-chilling before slicing: yields messy, melting slices—chill at least 45 minutes. • Ignoring oven hot spots: rotate the pan halfway through baking for even color and set. Data-backed tip: temperature variance of ±15°F can alter bake time by 10–20%—use an oven thermometer for precision.
Storing Tips for the Recipe
Refrigerate bars in an airtight container for up to 4–5 days; press plastic wrap directly onto the surface before sealing to prevent drying. Freeze for longer storage: freeze whole pan wrapped in two layers of plastic and foil for up to 2 months; thaw overnight in the refrigerator and bring to room temp for 20 minutes before serving. Make-ahead: prepare the batter and cream cheese filling separately and refrigerate up to 24 hours; bring to room temperature, assemble, and bake when ready. Practical storage note: sliced bars exposed to air lose gloss and moisture—keep slices snugly packed.
Conclusion
These Red Velvet Cream Cheese Swirl Bars balance visual drama with a tender, creamy bite by focusing on cream cheese temperature, swirl technique, and chilling. With straightforward swaps and practical tips, you can tailor richness, color, and nutrition without sacrificing flavor. Try the recipe this week: experiment with natural coloring or a part-skim cream cheese swap, then comment with your favorite variation or photo—your feedback helps refine timing and texture tips for other readers.
FAQs
Q: Can I make these in a 9×13 pan? A: Yes—double the recipe for a 9×13 and adjust bake time to 30–40 minutes; start checking at 28 minutes for set centers. Q: How do I avoid cracks in the cream cheese layer? A: Avoid overbeating the cream cheese, don’t overbake, and cool slowly; adding a tablespoon of cornstarch to the filling can stabilize it. Q: Can I use natural food dyes only? A: Yes—beet powder or concentrated pomegranate will give red tones but may shift flavor and require a bit more to match vibrancy. Q: How should I cut perfectly even bars? A: Chill fully, mark portions with a thin knife or ruler, and heat the knife under hot water between cuts. Q: Are these suitable for freezing after slicing? A: Yes—freeze slices on a tray to set, then stack with parchment between pieces in an airtight container for up to 2 months. Q: How many servings does this recipe make? A: Typically 12–16 bars depending on cut size; scoring before chilling helps portion evenly.
Explore related recipes: try cream cheese swirl blondies, red velvet cupcakes with cream cheese frosting, or a low-sugar skillet red velvet cake to expand your repertoire and compare textures.
Red Velvet Cream Cheese Swirl Bars
Soft red velvet bars with a tangy cream cheese swirl — an easy crowd-pleaser.
Ingredients
- 1 1/2 cups (190 g) all-purpose flour
- 1 tablespoon unsweetened cocoa powder
- 1 teaspoon baking powder
- 1/2 teaspoon salt
- 1 cup (200 g) granulated sugar
- 1/2 cup (115 g) unsalted butter, softened
- 2 large eggs, room temperature
- 1/2 cup (120 ml) buttermilk
- 2 tablespoons (30 ml) red food coloring (adjust for desired color)
- 1 teaspoon vanilla extract
- 1 teaspoon distilled white vinegar
- 1/2 teaspoon baking soda
- Cream cheese swirl:
- 8 oz (225 g) cream cheese, softened
- 1/3 cup (67 g) granulated sugar
- 1 large egg
- 1/2 teaspoon vanilla extract
- Pinch of salt
Instructions
- Preheat the oven to 350°F (175°C). Line a 9×13-inch (23×33 cm) baking pan with parchment paper, leaving an overhang for easy removal, and lightly grease the parchment.
- In a medium bowl, whisk together the flour, cocoa powder, baking powder, and salt; set aside.
- In a large bowl, cream the softened butter and granulated sugar until light and fluffy. Add the eggs one at a time, mixing well after each addition.
- Stir in the buttermilk, red food coloring, vanilla extract, and vinegar. Sprinkle the baking soda over the wet mixture and gently fold to combine (the vinegar and baking soda will activate).
- Fold the dry ingredients into the wet ingredients just until combined. Do not overmix.
- Spread about two-thirds of the red velvet batter evenly into the prepared pan, smoothing the top with a spatula.
- Make the cream cheese swirl: In a medium bowl, beat the softened cream cheese with the sugar until smooth. Add the egg, vanilla, and a pinch of salt and beat until combined and creamy.
- Drop spoonfuls of the cream cheese mixture over the red velvet layer. Dollop the remaining red velvet batter on top (it will be in clumps).
- Use a butter knife or skewer to swirl the red velvet and cream cheese layers together, creating a marbled pattern. Be careful not to over-swirl.
- Bake for 25–30 minutes, or until the cream cheese is set and a toothpick inserted into the red velvet portion (not the cream cheese) comes out with a few moist crumbs. The center should not be jiggly.
- Allow the pan to cool completely on a wire rack, then refrigerate for at least 1 hour to firm up for cleaner slices.
- Use the parchment overhang to lift the slab from the pan and slice into 12 bars. Store chilled in an airtight container for up to 4 days or freeze for longer storage.
Nutrition Information
- Calories: 320 kcal
- Cholesterol: 60 mg
- Sodium: 180 mg
- Carbohydrates: 35 g
- Fiber: 1 g
- Sugar: 24 g
- Protein: 4 g