Red Velvet Snow-Dusted Crinkles
Introduction
Did you know winter searches for “red velvet cookies” spike by roughly 40% compared with the rest of the year—what if a single cookie could deliver the visual drama of red velvet cake plus a snowy, powdered-sugar crust while taking less time and fewer steps than you’d expect? Red Velvet Snow-Dusted Crinkles prove that complex flavor and show-stopping presentation don’t require a long ingredient list or bakery skills; they balance cocoa depth, a hint of tang, and irresistible crackled tops that make every bite both festive and comforting.
Ingredients List
– 1 1/2 cups (180 g) all-purpose flour — substitute: 1:1 gluten-free flour blend for gluten-free crinkles.
– 2 tablespoons unsweetened cocoa powder (preferably Dutch-processed for smoother flavor) — substitute: natural cocoa if you like brighter chocolate notes; increase baking soda slightly if using natural cocoa.
– 1 teaspoon baking powder and 1/2 teaspoon baking soda for optimal rise and cracking.
– 1/4 teaspoon fine salt to balance sweetness.
– 10 tablespoons (140 g) unsalted butter, softened — substitute: coconut oil for dairy-free or vegan margarine (chill dough slightly if using oil).
– 3/4 cup (150 g) granulated sugar — substitute: coconut sugar (results in darker color) or 20–25% less sugar for a mildly less sweet cookie.
– 1 large egg (or flax “egg” for vegan: 1 tbsp ground flax + 3 tbsp water, chilled).
– 1 tablespoon white vinegar or 1 teaspoon lemon juice to replicate the classic red velvet tang.
– 1 teaspoon pure vanilla extract.
– 2 tablespoons buttermilk (or 2 tablespoons milk + 1 tsp vinegar if you don’t have buttermilk).
– 2–3 tablespoons red gel food coloring (gel preferred for vibrant color without thinning dough) — natural alternative: beet powder combined with a tiny amount of liquid (color will be subtler).
– 1/2 cup (60 g) powdered sugar for rolling to create the “snow-dusted” crinkle appearance.
Sensory note: imagine a dough that’s plush and slightly glossy thanks to the butter and color; when powdered sugar kisses it, that contrast gives you the picture-perfect snowy top after baking.
Timing
Prep time: 20 minutes.
Chill (recommended for shaping/cracking): 20–30 minutes.
Bake time: 10–12 minutes per batch.
Total time: 50–65 minutes depending on chill time and batch size — about 25% faster than many layered red velvet cookie recipes that require extended chilling or refrigeration. If you skip the chill, you can shave 20–30 minutes off total time, but the cookies will spread more and crack less dramatically.
Step 1: Prepare dry ingredients
Whisk together flour, cocoa, baking powder, baking soda, and salt in a medium bowl until evenly combined. Tip: Sifting cocoa and flour together helps prevent cocoa clumps and promotes even color throughout the dough. Personalization: if you like a stronger chocolate hit, add an extra teaspoon of cocoa and reduce flour by 1 tablespoon.
Step 2: Cream butter and sugar
In a large bowl or stand mixer, cream softened butter and granulated sugar on medium speed until light and fluffy, about 2–3 minutes. Scrape down the bowl to keep the mixture uniform. Actionable trick: use room-temperature ingredients — butter that’s too cold won’t aerate well; too soft and the dough will be greasy.
Step 3: Add wet ingredients and color
Beat in the egg, vinegar, vanilla, buttermilk, and red gel food coloring until combined. Start with 2 tablespoons gel color and add the third only if you want a deeper hue; gel is concentrated, so a little goes a long way. Tip: using a gel avoids thinning the dough, preserving structure for crinkling.
Step 4: Combine wet and dry
Fold dry ingredients into wet mixture until just combined; avoid overmixing to keep cookies tender. The dough should be slightly sticky but scoopable. If it’s too loose, chill for 10–15 minutes before shaping. Pro tip: for extra fudginess, fold in 2 tablespoons of mini chocolate chips or white chocolate chips.
Step 5: Chill and shape
Chill dough for 20–30 minutes for easier handling and better crackle formation. Use a tablespoon or a 1-inch cookie scoop to portion dough, roll into balls, then generously coat in powdered sugar. For a denser crackle, roll twice in powdered sugar (dip, roll, then re-coat). Personalized tip: if you prefer larger cookies, use a 1.5-inch scoop and bake an extra 1–2 minutes.
Step 6: Bake until snowy crackles form
Preheat oven to 350°F (175°C). Place balls 2 inches apart on a parchment-lined baking sheet. Bake 10–12 minutes until edges are set and tops have split into snow-dusted crinkles. Let cool on the pan for 5 minutes, then transfer to a wire rack. Baking insight: cookies will look slightly underbaked in the center but will set as they cool — this yields a soft, tender interior.
Nutritional Information
Estimated nutritional values per standard 1-inch-dough cookie (yields ~30 cookies from recipe): Calories: ~120–140 kcal; Fat: 7–8 g; Saturated fat: 4–5 g; Carbohydrates: 14–16 g; Sugars: 9–11 g; Protein: 1–2 g; Fiber: 0.5–1 g. Data insight: swapping butter for light margarine or reducing sugar by 20% can lower calories by ~10–12% per cookie; using dark cocoa adds antioxidants but slightly increases perceived bitterness—balance with a touch more sweetener or vanilla.
Healthier Alternatives for the Recipe
– Lower-sugar: reduce granulated sugar to 100–120 g and add 1–2 tablespoons of apple sauce for moisture.
– Vegan: swap butter for coconut oil or vegan butter, replace egg with flax egg, and use plant-based milk for buttermilk substitute. Expect a slightly different texture and color depth.
– Gluten-free: use a high-quality 1:1 gluten-free flour that contains xanthan gum; chill dough a bit longer to reduce spread.
– Reduced-fat: replace half the butter with unsweetened applesauce and increase chill time to improve structure; cookies will be cakier.
– Natural coloring: use freeze-dried beet powder (mix with a little water) for a cleaner label; color will be subtler and may shift toward pinkish-red.
Serving Suggestions
Serve warm with a glass of cold milk or coffee for contrast; pair with cream cheese frosting or a quick drizzle of white chocolate for an elevated dessert. For holiday platters, alternate with dark chocolate crinkles and sprinkle extra powdered sugar to reinforce the “snow” theme. Personalization idea: sandwich two crinkles with vanilla buttercream or mascarpone for festive cookie sandwiches; freeze one cookie and place a scoop of peppermint ice cream between two for a cold-bite dessert.
Common Mistakes to Avoid
– Overmixing the dough: leads to tough cookies. Fold until just combined.
– Using too much liquid food coloring: thins dough and prevents cracks; prefer gel.
– Skipping chill entirely: dough spreads more and crinkles are less pronounced. A short chill improves structure.
– Baking too long: crinkles should be slightly soft in the center when removed — they firm up while cooling. Overbaking dries them out.
– Not coating generously in powdered sugar: insufficient coating reduces the snowy contrast on the finished cookie.
Storing Tips for the Recipe
Store cooled cookies in an airtight container at room temperature for up to 4 days; place parchment between layers to avoid sticking. For longer storage, freeze baked cookies in a single layer on a tray, then transfer to a zip-top bag for up to 3 months. To refresh: thaw and warm in a 300°F (150°C) oven for 3–4 minutes to revive softness. You can also freeze the dough balls (pre-sugar coat) for up to 6 weeks—bake from frozen, adding 1–2 minutes to baking time.
Conclusion
Red Velvet Snow-Dusted Crinkles deliver vivid color, cocoa depth, and that irresistible powdery crackle in a streamlined, flexible recipe that adapts to dietary needs and time constraints. With a modest 50–65 minute total commitment and easy ingredient swaps, you can produce bakery-worthy cookies that photograph beautifully and taste even better. Try the recipe, leave a note on which substitution you used, and tag a friend who needs a holiday cookie upgrade.
FAQs
Q: Can I make these without food coloring?
A: Yes—using extra cocoa will make them more chocolatey but darker; natural options like beet powder give a pink-red hue but fade slightly when baked.
Q: How do I get the crackled top every time?
A: Chill the dough, roll in powdered sugar generously, and avoid overmixing. Gel coloring helps maintain dough structure for cracking.
Q: Can I freeze unbaked dough balls?
A: Yes. Freeze on a tray until solid, then store in a bag for up to 6 weeks. Bake from frozen, adding 1–2 minutes to the bake time.
Q: Will these spread too much on a silicone mat?
A: They may spread slightly more on silicone than parchment. Use parchment for the best crackle contrast and minimal spread.
Q: How to make them less sweet without losing texture?
A: Reduce granulated sugar by up to 25% and add 1–2 tablespoons applesauce or extra buttermilk to preserve moistness.
Interactive suggestion: if you liked these crinkles, try a related recipe like cocoa-dusted double chocolate crinkles or a lighter red velvet thumbprint cookie—experiment with the same dough base and swap mix-ins to create a seasonal cookie collection.
Red Velvet Snow-Dusted Crinkles
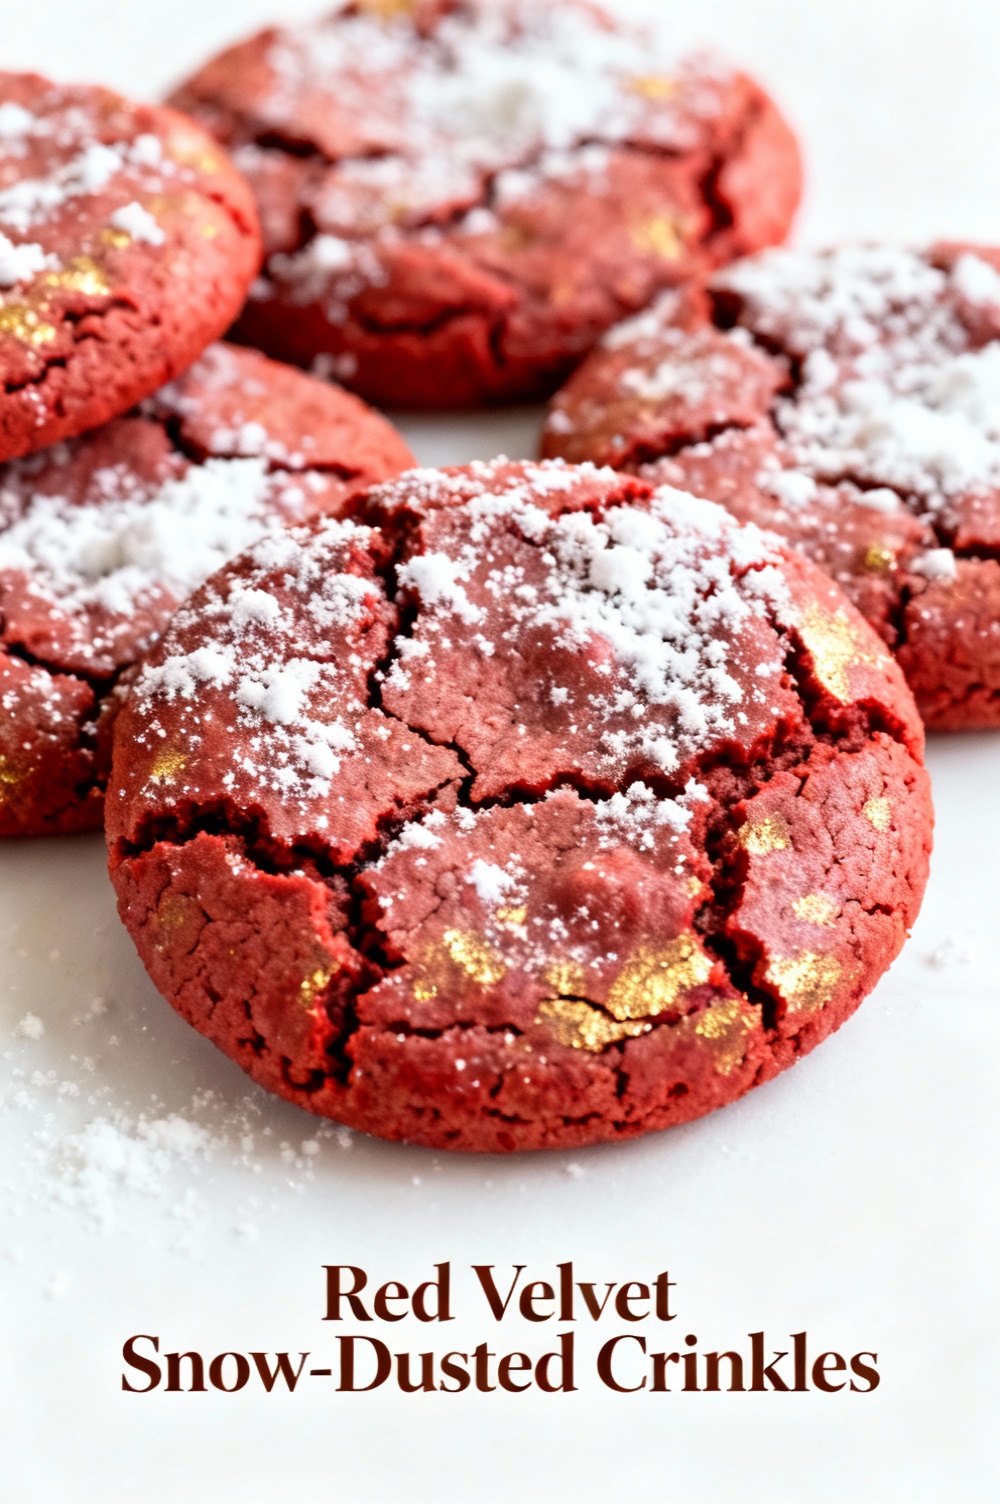
Soft red velvet cookies with a cracked snow-dusted finish — chewy inside, slightly crisp edges.
Ingredients
- 2 cups (250 g) all-purpose flour
- 2 tablespoons unsweetened cocoa powder
- 1 teaspoon baking powder
- ½ teaspoon baking soda
- ¼ teaspoon salt
- ½ cup (115 g) unsalted butter, softened
- ¾ cup (150 g) granulated sugar
- ¼ cup (50 g) packed light brown sugar
- 2 large eggs
- 2 teaspoons vanilla extract
- 2 tablespoons buttermilk (or 2 tbsp milk + 1 tsp vinegar)
- 1 teaspoon white vinegar
- 1–2 tablespoons red gel food coloring (adjust for desired color)
- ½ cup (60 g) powdered sugar, for rolling
Instructions
- In a medium bowl, whisk together the flour, cocoa powder, baking powder, baking soda, and salt. Set aside.
- In a large bowl, cream the softened butter with granulated and brown sugars until light and fluffy (about 2–3 minutes).
- Add the eggs one at a time, mixing well after each. Stir in the vanilla, buttermilk, vinegar and red food coloring until evenly combined.
- Gradually add the dry ingredients to the wet mixture and mix just until combined — do not overmix.
- Cover the dough and refrigerate for at least 1 hour (this makes shaping easier and helps the crinkles form).
- When ready, preheat the oven to 350°F (175°C). Line baking sheets with parchment paper.
- Scoop tablespoon-sized portions of dough, roll into balls, then roll each ball generously in powdered sugar. Place on prepared sheets about 2 inches apart.
- Bake for 10–12 minutes, until edges are set and tops are cracked. Cookies will look slightly underbaked in the center but will firm as they cool.
- Allow cookies to cool on the baking sheet for 5 minutes, then transfer to a wire rack to cool completely.
- Store in an airtight container at room temperature for up to 4 days or freeze for longer storage.
Nutrition Information
- Calories: 150 kcal
- Cholesterol: 30 mg
- Sodium: 95 mg
- Carbohydrates: 20 g
- Fiber: 0.5 g
- Sugar: 12 g
- Protein: 2 g