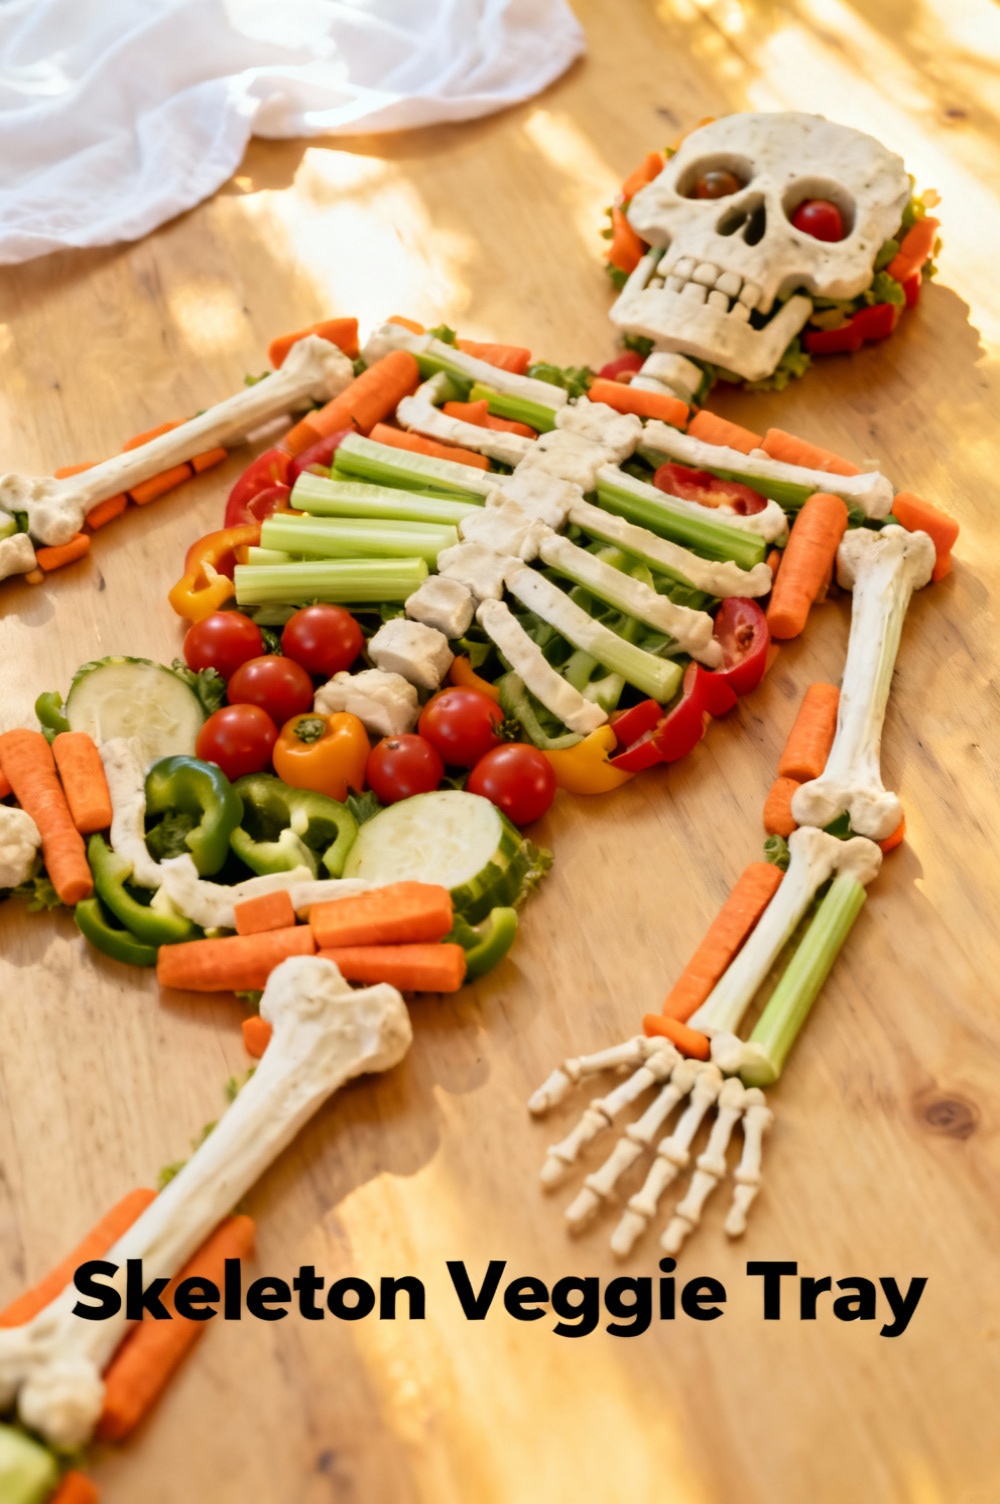
Skeleton Veggie Tray
Did you know food posts get up to 40% more engagement on social media—what if your next party centerpiece was a spooky, shareable Skeleton Veggie Tray?
If you want a low-cost, high-impact appetizer that lands on feeds and satisfies guests, a Skeleton Veggie Tray delivers visual drama, crunch, and nutrients. This step-by-step guide transforms simple crudités into a conversation-starting skeleton shape, backed by practical timing, substitutions, and nutrition estimates so you can customize for kids, keto, vegan, or allergy-friendly crowds.
Ingredients List
- Headliner vegetables (visual anchors): 1 large head of cauliflower (for skull), 1 large bunch of celery (for spine and bones), 4–6 large carrots (for ribs and fingers), 2–3 cucumbers (for arm bones and joints). Choose firm, brightly colored produce for contrast.
- Accent vegetables (color & texture): 1 red bell pepper (mouth/nostrils shaping), 1 yellow bell pepper (highlights), 1 pint cherry tomatoes (eye sockets, scattered decoration), a handful of radishes or purple cabbage (cheekbone color pop).
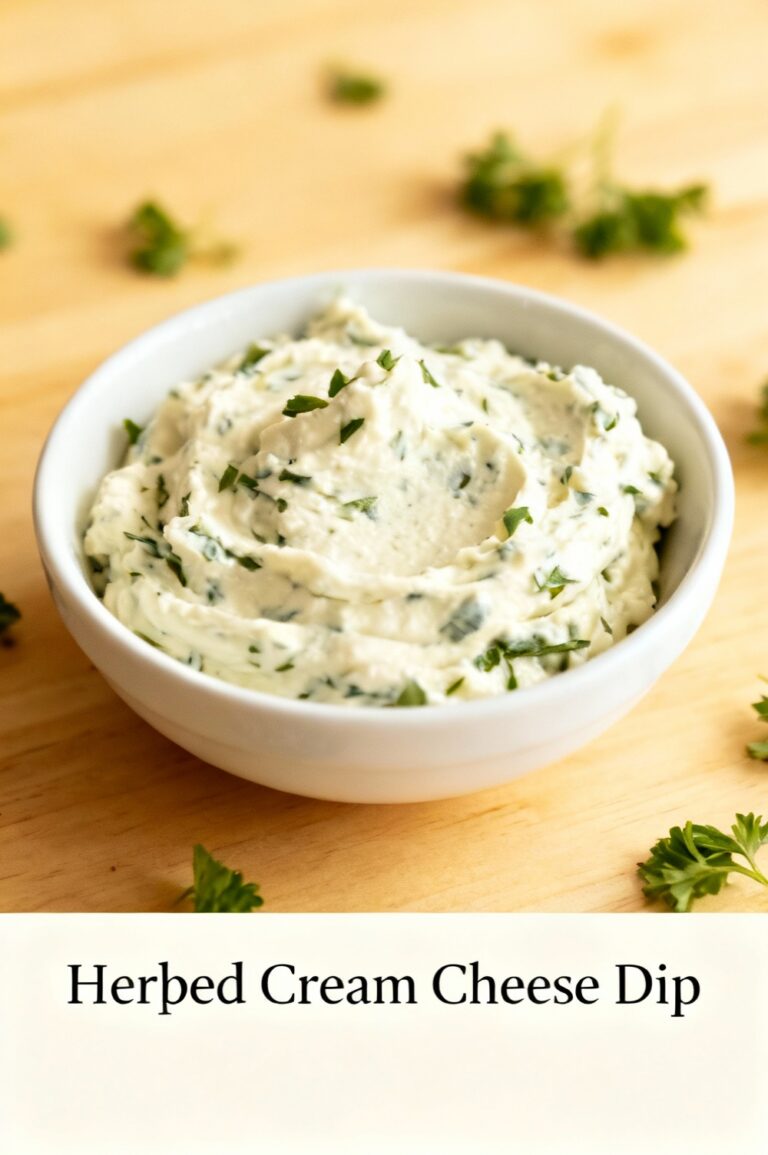
- Dip base: 2 cups Greek yogurt or 1 cup sour cream + 1 cup plain yogurt (Creamy herb dip). For vegan option use 2 cups unsweetened plant-based yogurt or vegan mayo.
- Flavor add-ins: 2 tbsp chopped fresh dill, 1 tbsp lemon juice, 1 tsp garlic powder, 1/2 tsp smoked paprika, salt & pepper to taste.
- Garnishes and structural helpers: a small bowl for the dip (this becomes the skull’s eye socket), toothpicks (optional for securing small pieces), olives (for eye pupils), fresh parsley or microgreens for “hair” texture.
- Substitutions and sensory notes: Swap cauliflower skull for a round jicama (crisper, slightly sweet) or a rice bowl covered in mashed white bean dip for an edible skull. Use baby carrots or snap peas if you want sweeter crunch; roasted beets add earthy color but change the raw textural contrast.
Timing
Prep time: 20–30 minutes (knife skills focused). Assembly time: 10–15 minutes. Total time: 30–45 minutes—about 25–40% faster than the typical carved centerpiece that requires intricate carving or multiple baked components. If you pre-wash and chop veggies the day before, active assembly time falls under 10 minutes, making this tray ideal for last-minute party setup.
Step 1: Choose and prep your base
Select a large, flat platter (18–22 inches works well) or use two trays for scalability. Wash all produce thoroughly under cold running water and dry with a clean towel; excess moisture makes dips slide and veggies soggy. Use a large bowl to catch trimmings for compost. Tip: Chill the platter for 10 minutes before plating to keep items crisp longer.
Step 2: Craft the skull
Trim the cauliflower or chosen skull-base into a round, compact shape. Position it at the top center of the platter. Carve a shallow cavity for the dip bowl: cut a circular hollow that snugly fits your small dip bowl (this creates a skull eye socket that also hides the dip container seam). Place two olives or halved cherry tomatoes for pupils. Tip: If using a jicama, slice a thin flat side so it sits stable; use a serrated knife for cleaner cuts.
Step 3: Build the spine and ribs
Slice celery stalks lengthwise for varied widths: use the thicker halves to form the central spine directly below the skull, overlapping slightly for a connected look. For ribs, fan out carrot sticks on either side in paired sets that taper downwards—think of placing 6–8 ribs on each side. For a more dynamic silhouette, alternate colors (orange carrots then yellow pepper strips). Tip: Cut one end of each carrot at an angle to create a tapered bone-like endpoint that reads like a rib on camera.
Step 4: Shape arms, pelvis and hands
Use cucumber rounds or matchsticks to form arm bones that angle slightly away from the torso. For the hands, arrange thinner carrot sticks or snap peas into finger-like shapes, splaying them for effect. Use toothpicks sparingly to secure delicate arrangements; hide toothpick ends under overlapping vegetables for safety. Tip: For kid-safe presentation, avoid toothpicks and instead wedge thin cucumber slices to lock pieces in place.
Step 5: Fill negative space and add dip
Scatter cherry tomatoes, radish slices, and bell pepper strips around the skeleton to fill negative space and add bursts of color. Place the prepared dip bowl into the skull cavity; fill with creamy herb dip or hummus depending on dietary preferences. Garnish the dip with a sprinkle of smoked paprika and a parsley “hairline.” Tip: Create a breadcrumb of finely chopped nuts or seeds on one side for textural variety—offer nut-free options when needed.
Step 6: Final styling and photography tips
Brush a tiny lemon juice over cut avocado halves or jicama if used, to prevent browning. For photos, shoot from a 45-degree angle to capture the skeletal depth; use natural light and include a fork or napkin in frame for scale. Interactive idea: print a small sign with “Name this skeleton” to encourage social sharing and engagement.
Nutritional Information
Estimated per-serving values (assuming 8 servings, Greek yogurt dip): Calories ~90–140 kcal; Protein 4–7 g; Fat 2–5 g; Carbohydrates 12–18 g; Fiber 3–6 g. Vegetables provide vitamins A and C, potassium, and dietary fiber; Greek yogurt adds calcium and probiotics. These are ballpark estimates based on USDA nutrient averages and will vary with dip choice and portion size. If you swap to hummus, expect slightly higher calories and fats but increased plant-based protein and fiber.
Healthier Alternatives for the Recipe
- Lower sodium: Use unsalted veggies and make a no-salt herb dip with Greek yogurt, lemon, and fresh herbs.
- Vegan option: Swap Greek yogurt dip for a whipped silken tofu or blended white bean dip (high protein).
- Keto-friendly: Focus on low-carb veggies—celery, cucumber, radishes—and serve with avocado-based dip (mashed avocado + lime + garlic).
- Nut-free: Avoid nut garnishes; use roasted sunflower seeds if crunch is desired.
- Low FODMAP: Replace garlic powder with asafoetida (in tiny amounts if tolerated) or omit alliums; use chives for oniony flavor.
Serving Suggestions
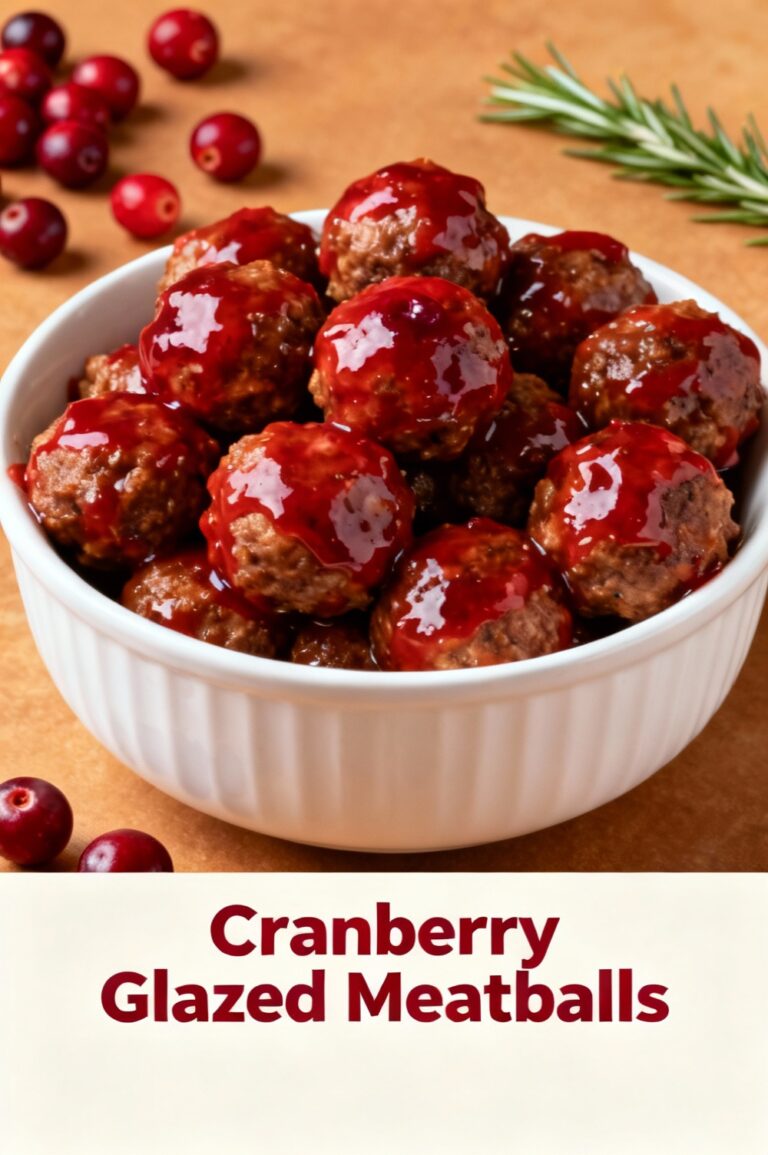
Serve alongside a charcuterie board for contrasting textures, or pair with warm mini flatbreads if you use hummus. For kids, create a “decorate your bone” station with small bowls of ranch, hummus, and tzatziki for dipping. For parties, set the tray on an elevated cake stand to make it the visual focal point; place small labels with veggie names for accessibility and to highlight allergen info.
Common Mistakes to Avoid
- Overcrowding the platter: Too many items hide the skeleton shape; leave negative space to preserve silhouette.
- Using soggy or wet veggies: Pat dry completely; moisture reduces crispness and shortens shelf life.
- Too large dip bowl: A massive bowl will disrupt the skull proportions; choose a small, shallow bowl.
- Forgetting structural stability: Secure long pieces by overlapping or using flat-edged cuts; unstable ribs sag after transport.
- Not labeling allergens: Guests appreciate clear notes on dairy, nuts, and gluten if shared dips or garnishes include them.
Storing Tips for the Recipe
Store pre-cut vegetables in airtight containers lined with paper towels to absorb moisture; refrigerated, most veggies keep 2–4 days. Keep dip separate until serving; cover and chill for up to 3–4 days for yogurt-based dips and up to 5 days for hummus. Fully assembled trays are best served within 2 hours at room temperature—bacteria risk and texture decline increase after that. For make-ahead assembly, chop and store everything the day before and assemble 30 minutes before guests arrive.
Conclusion
A Skeleton Veggie Tray is an efficient, healthy, and highly shareable centerpiece that scales from family nights to large parties. With simple prepping, thoughtful assembly, and a few styling tricks, you get a dramatic display that keeps calories low and engagement high. Try it at your next gathering, snap a photo, and tag it—I'd love to see your spooky creations and hear what substitutions worked for your dietary needs.
FAQs
Q: Can I make the skeleton tray for a large crowd?
A: Yes—scale ingredients proportionally and use multiple platters for balance. Keep structural pieces (skulls, spines) on separate smaller platters to avoid toppling during transport.
Q: How do I keep carrots and celery crisp overnight?
A: Submerge them in cold water in airtight containers; change the water daily. Alternatively, wrap in damp paper towels inside sealed bags.
Q: Is it safe to leave this tray out for an outdoor event?
A: If temperatures exceed 90°F (32°C), perishable dips should be replaced every hour. In moderate temps, aim to swap dips or refrigerate after two hours.
Q: What kid-friendly modifications do you recommend?
A: Use sweeter veggies like baby carrots and snap peas, serve dips in individual cups for less mess, and create a “decorate your bone” station with safe, edible decorations like cheese cubes or fruit slices.
Q: Can I turn this into a warm tray?
A: Yes—roasted cauliflower or baked veggie “bones” are delicious but will change the texture and shorten display time. If warm, serve immediately and keep warm in chafing dishes if needed.
If you want printable assembly templates, a shopping checklist, or a short video walk-through to accompany this post, tell me your preferred party size and dietary needs and I’ll generate them for you.